在Windows应用程序开发中,WinForm和WPF是两种主要的技术框架。它们各自有不同的设计理念、渲染机制和开发模式。本文将详细探讨WPF与WinForm的本质区别,并通过示例进行说明。
1. 渲染机制 WinForm WinForm基于Windows GDI/GDI+进行渲染,这是一种基于CPU的渲染技术。每个控件都是Windows原生控件的封装,适合简单的用户界面。
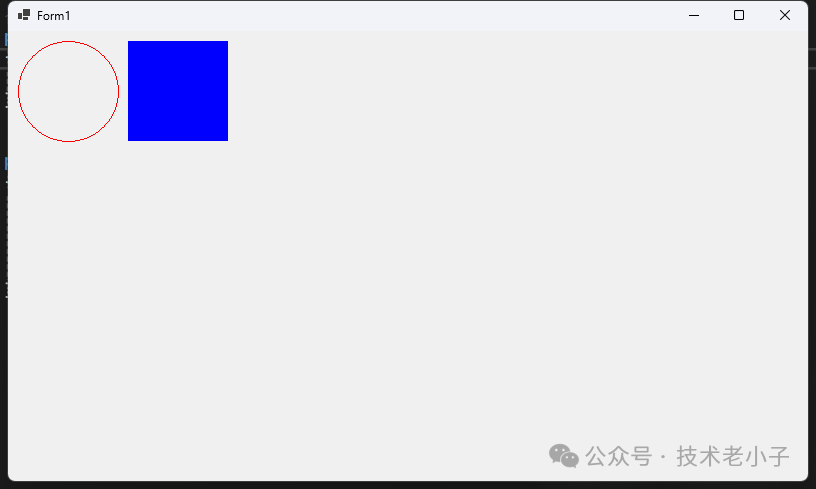
示例:在WinForm中绘制自定义图形
protected override void OnPaint (PaintEventArgs e) 10 , 10 , 100 , 100 );120 , 10 , 100 , 100 );
WPF WPF使用DirectX进行渲染,是一种基于GPU的渲染技术。所有控件都是由矢量图形组成,能够充分利用GPU加速,处理复杂动画和图形效果。
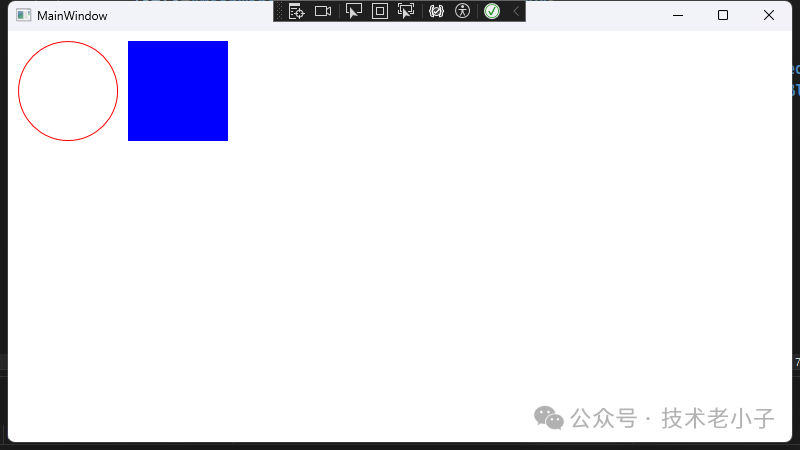
示例:在WPF中绘制相同图形
<Canvas > <Ellipse Width ="100" Height ="100" Margin ="10,10,0,0" Stroke ="Red" StrokeThickness ="1" /> <Rectangle Width ="100" Height ="100" Margin ="120,10,0,0" Fill ="Blue" /> </Canvas >
2. 布局系统 WinForm WinForm使用基于像素的绝对定位系统,控件位置通过坐标确定。虽然可以使用Dock等方法进行布局,但相对较为复杂。
示例:WinForm布局
button1.Location = new Point(10 , 10 );new Size(100 , 30 );new Point(120 , 10 );new Size(100 , 30 );WPF WPF采用基于容器的流式布局系统,提供多种布局面板(如StackPanel、Grid等),使得界面设计更加灵活。
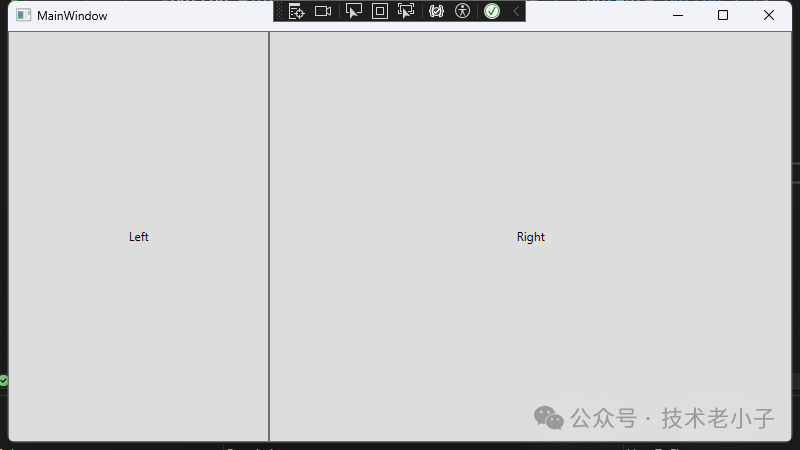
示例:WPF布局
<StackPanel > <Button Width ="100" Height ="30" Margin ="5" Content ="Button 1" /> <Button Width ="100" Height ="30" Margin ="5" Content ="Button 2" /> </StackPanel > <Grid > <Grid.ColumnDefinitions > <ColumnDefinition Width ="*" /> <ColumnDefinition Width ="2*" /> </Grid.ColumnDefinitions > <Button Grid.Column ="0" Content ="Left" /> <Button Grid.Column ="1" Content ="Right" /> </Grid >
3. 数据绑定 WinForm WinForm提供简单的数据绑定机制,主要用于Windows Forms控件和数据源之间的绑定。
示例:WinForm数据绑定
public class Person {public string Name { get; set ; }public int Age { get; set ; }// 在窗体中 new Person { Name = "John" , Age = 30 };"Text" , person, "Name" );"Value" , person, "Age" );WPF WPF提供了强大的数据绑定系统,支持多种绑定模式和转换器,能够实现更复杂的数据交互。
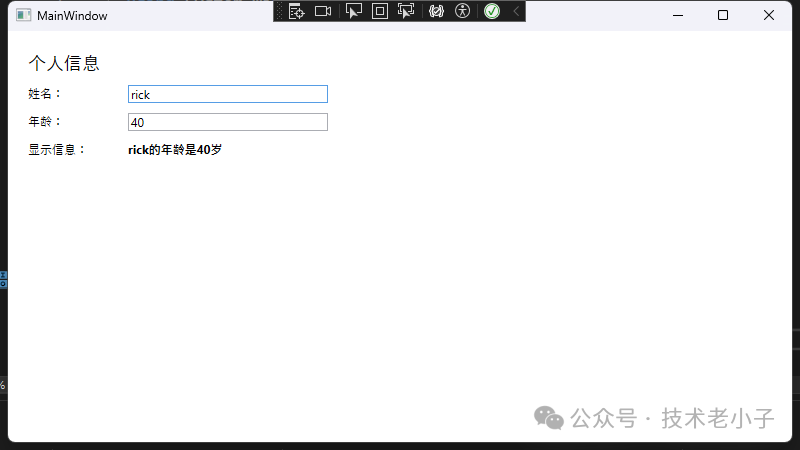
示例:WPF数据绑定
<Window x:Class ="AppWpf.MainWindow" xmlns ="http://schemas.microsoft.com/winfx/2006/xaml/presentation" xmlns:x ="http://schemas.microsoft.com/winfx/2006/xaml" xmlns:d ="http://schemas.microsoft.com/expression/blend/2008" xmlns:mc ="http://schemas.openxmlformats.org/markup-compatibility/2006" xmlns:local ="clr-namespace:AppWpf" mc:Ignorable ="d" Title ="MainWindow" Height ="450" Width ="800" > <Window.Resources > <local:AgeConverter x:Key ="AgeConverter" /> </Window.Resources > <Grid > <StackPanel Margin ="20" > <TextBlock Text ="个人信息" FontSize ="18" Margin ="0,0,0,10" /> <StackPanel Orientation ="Horizontal" Margin ="0,0,0,10" > <TextBlock Text ="姓名:" Width ="100" /> <TextBox Text ="{Binding Name, UpdateSourceTrigger=PropertyChanged}" Width ="200" /> </StackPanel > <StackPanel Orientation ="Horizontal" Margin ="0,0,0,10" > <TextBlock Text ="年龄:" Width ="100" /> <TextBox Text ="{Binding Age, Converter={StaticResource AgeConverter}}" Width ="200" /> </StackPanel > <StackPanel Orientation ="Horizontal" Margin ="0,0,0,10" > <TextBlock Text ="显示信息:" Width ="100" /> <TextBlock Text ="{Binding DisplayInfo}" FontWeight ="Bold" /> </StackPanel > </StackPanel > </Grid > </Window > public class PersonViewModel :private string _name;private int _age;public string Nameset public int Ageset private string _displayInfo;public string DisplayInfoprivate set private void UpdateDisplayInfo () string .IsNullOrEmpty(Name)"请输入姓名" "{Name}的年龄是{Age}岁" ;public event PropertyChangedEventHandler PropertyChanged;protected void OnPropertyChanged ([CallerMemberName] string name = null) this , new PropertyChangedEventArgs(name));
4. 控件自定义 WinForm WinForm主要通过属性设置和重写绘制方法来自定义控件外观。
示例:自定义WinForm按钮外观
public class CustomButton :protected override void OnPaint (PaintEventArgs pevent) using (StringFormat sf = new StringFormat()) {
WPF WPF允许通过样式和模板来定义控件的外观,提供了更强大的样式定制能力。
示例:WPF按钮样式
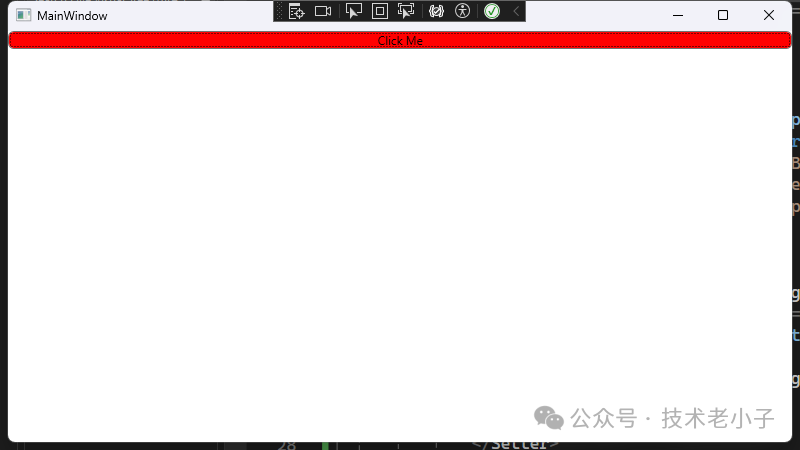
<Style TargetType ="Button" > <Setter Property ="Template" > <Setter.Value > <ControlTemplate TargetType ="Button" > <Border x:Name ="border" Background ="{TemplateBinding Background}" BorderBrush ="{TemplateBinding BorderBrush}" BorderThickness ="{TemplateBinding BorderThickness}" CornerRadius ="5" > <ContentPresenter HorizontalAlignment ="Center" VerticalAlignment ="Center" /> </Border > <ControlTemplate.Triggers > <Trigger Property ="IsMouseOver" Value ="True" > <Setter TargetName ="border" Property ="Background" Value ="Red" /> </Trigger > </ControlTemplate.Triggers > </ControlTemplate > </Setter.Value > </Setter > </Style >
5. 事件处理 WinForm WinForm使用传统的事件处理机制,事件处理相对简单。
示例:WinForm事件处理
public partial class Form1 :public Form1 () private void Button1_Click (object sender, EventArgs e) "Button Clicked!" );WPF WPF使用更复杂的路由事件系统,支持事件隧道和冒泡,提供更灵活的事件处理方式。
示例:WPF路由事件
<StackPanel PreviewMouseDown ="StackPanel_PreviewMouseDown" > <Button Content ="Click Me" MouseDown ="Button_MouseDown" /> </StackPanel > private void StackPanel_PreviewMouseDown (object sender, MouseButtonEventArgs e) // 隧道事件 - 首先触发 "StackPanel Preview" );private void Button_MouseDown (object sender, MouseButtonEventArgs e) // 冒泡事件 - 随后触发 "Button MouseDown" );6. 开发模式 WinForm WinForm适合快速原型开发,具有平缓的学习曲线,特别适合初学者和简单应用的开发。
WPF WPF采用MVVM(Model-View-ViewModel)模式,适合大型应用程序开发,支持组件化和模块化特性。
总结 WinForm和WPF各有其独特的优势和适用场景。WinForm以其简单易用和快速开发的特点,适合初学者和小型企业应用。而WPF则凭借其强大的图形处理能力、灵活的布局和数据绑定机制,适合构建复杂的企业级应用。对于开发者来说,理解这两者的本质区别,有助于选择合适的技术框架来满足项目需求。
阅读原文:原文链接
